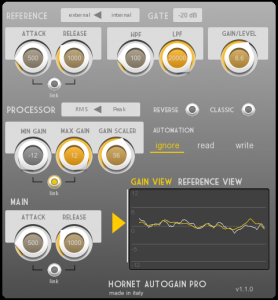
Three useful tips that you can use with HoRNet AutoGain Pro to help you with your mixes and productions
 HoRNet AutoGain Pro is one of our best sellers and a really useful tool in many ways. Here we teach you three tips for this audio plugin.
The first and obvious usage of HoRNet AutoGain Pro is for vocal automation, you can avoid making the boring automation needed to male the vocal sit perfectly in the mix simply following these steps (of course the exact instructions varies from DAW to DAW but this is the general principle):
When you need your voice overs to have a constant level and you want them to sound natural and not compressed, you can try the HoRNet AutoGain Pro with the reference set to “internal”. In this working mode the plugin uses an internal generator to create a constant reference level (that you can adjust with the “gain/level” knob. With the processing set to internal and the detector in RMS mode you are actually forcing the plugin to try to maintain the average level to the specified value with the “gain/level” knob.
As always with vocal processing you should keep the attack and release time to around 300 – 500 milliseconds.
With AutoGain Pro you can adjust your bass tracks dynamics and then feed the bass compressor with a more manageable track. If your bass player played some notes too soft and other too loud we can fix them using the plugin with the following settings:
These are just three simple tips that you can use to improve your productions using AutoGain Pro, do you have some more? Just le us know in the comments here below!
Hey, Im having some confusion with autogain pro. It seems as if the gate function controls the level of gain. It appears as if the gain/lever knob does nothing. Any clarity on this is appreciated, thanks.
well usually you want to move the levels of the vocals according to the level of the music not the other way around since it's not that nice to have less dynamic instruments like bass or guitars change in volume to follow the level of a much more dynamic instrument like the human voice.
CAN YOU PLZ EXPLAIN THIS Because I always side-chain my vocals to the instrumentals or is it the other way around or is what you said in the explanation, I would love to be helped
create a bus for the vocals and one
for the music, route the vocals to the
first bus and the music to the second
bus
2. put AutoGain Pro on the vocal bus
and set the music bus as input for the
sidechain of the plugin
3. adjust the controls of AutoGain Pro
to taste, but going with linked attack
and release of around 300ms and
RMS mode should work fine most of
the time. If the gain excursion is too
high you can reduce it using the gain
scaler knob.
If you could make a video for using this plugin, that would be very helpful.
Thank you !